Tutorial: How to set up a contact form with Django
This tutorial is intended as a follow-on to my book, Hello Web App, which teaches the basics of web app development — from ideation to deployment. You can order the book here (starting at $14.95).
In this walkthrough, we're going to build something relatively easy: a simple contact form where your users can enter their name, email address, and message, and your website will email you the message (with the user's email as the reply-to.)
Set up the URL
Pretty much every new feature that'll go into your web app will go through the same process: set up the URL, set up the logic, set up the template. For the URL, we're going to set up a simple page under contact, so: http://localhost.com/contact/.
Hint: "collection" is the name of the specific Django app we set up in the Hello Web App tutorial. Replace it with the name of your own web app.
Add the below to your urls.py:
urls.py
# add to the top
from collection import views

urlpatterns = [
    url(r'^$', views.index, name='home'),
    # new url definition
    url(r'^contact/$', views.contact, name='contact'),
Start setting up the view
Now in views.py, we need to start setting up the logic. Let's set it up to just display a form for now, and we'll do the rest of the logic for after the form is submitted in a bit:
views.py
# add to the top
from collection.forms import ContactForm

# add to your views
def contact(request):
    form_class = ContactForm

    return render(request, 'contact.html', {
        'form': form_class,
    })
We're just grabbing a form (which we haven't defined yet) and passing it over into the template (which we haven't created yet.)
Set up the form
In Hello Web App, we went over creating forms with ModelForms, but skipped creating basic forms without a model. It's just as simple!
In our forms.py, add the below form code:
forms.py
# make sure this is at the top if it isn't already
from django import forms

# our new form
class ContactForm(forms.Form):
    contact_name = forms.CharField(required=True)
    contact_email = forms.EmailField(required=True)
    content = forms.CharField(
        required=True,
        widget=forms.Textarea
    )
We're going to define the fields we want in our form, which'll be just the contact's name, their email, and what they'd like to say to you.
All those form fields were grabbed from Django's Form fields documentation, which is pretty easy to read to see what other fields are available. We're making all the form fields required, using an EmailField for the email so we can take advantage of the additional email formatting checks, and making the "content" field a larger Textarea.
Create the template
Now we need to create the template.html page to display the contact form on our website. We're going to extend the base layout we created in the Hello Web App tutorial, and then create the form using the form passed in from our view.
contact.html
{% extends 'layouts/base.html' %}
{% block title %}Contact - {{ block.super }}{% endblock %}

{% block content %}
<h1>Contact</h1>
<form role="form" action="" method="post">
    {% csrf_token %}
    {{ form.as_p }}
    <button type="submit">Submit</button>
</form>
{% endblock %}
At this point, we have all the pieces in place to display the form. Load /contact/ and check it out:
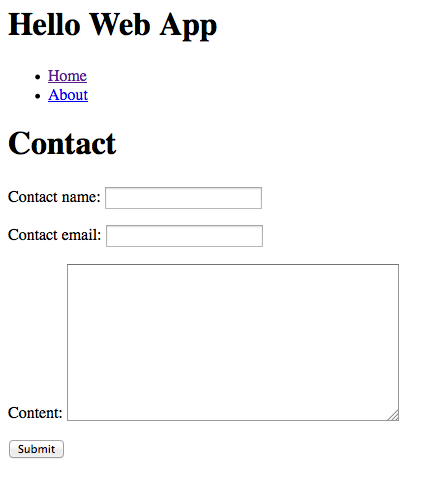
Nice! Now let's start adding the logic in the back end to handle the information submitted by the user.
Set up our local email server...
This will be redundant for you if you've finished the Hello Web App tutorial. In case you haven't, all you need to do to set up a local email server is add these lines to the bottom of your settings.py:
settings.py
EMAIL_BACKEND =
  'django.core.mail.backends.console.EmailBackend'
DEFAULT_FROM_EMAIL = '[email protected]'
EMAIL_HOST_USER = ''
EMAIL_HOST_PASSWORD = ''
EMAIL_USE_TLS = False
EMAIL_PORT = 1025
This tells Django to output the "email" to your console, where you ran your python manage.py runserver command. We'll see what this looks like in a second.
Add the email logic
Let's fill out the rest of the email logic. Here's the view from before, now filled in:
views.py
# new imports that go at the top of the file
from django.core.mail import EmailMessage
from django.shortcuts import redirect
from django.template.loader import get_template

# our view
def contact(request):
    form_class = ContactForm

    # new logic!
    if request.method == 'POST':
        form = form_class(data=request.POST)

        if form.is_valid():
            contact_name = request.POST.get(
                'contact_name'
            , '')
            contact_email = request.POST.get(
                'contact_email'
            , '')
            form_content = request.POST.get('content', '')

            # Email the profile with the
            # contact information
            template =
                get_template('contact_template.txt')
            context = {
                'contact_name': contact_name,
                'contact_email': contact_email,
                'form_content': form_content,
            }
            content = template.render(context)

            email = EmailMessage(
                "New contact form submission",
                content,
                "Your website" +'',
                ['[email protected]'],
                headers = {'Reply-To': contact_email }
            )
            email.send()
            return redirect('contact')

    return render(request, 'contact.html', {
        'form': form_class,
    })
Phew, a lot of logic! If you read the it from top to bottom, here's what's happening:
- If the form was submitted:
- Apply the information from the form to the form class we set up before.
- Make sure that everything is valid (no missing fields, etc.)
- Take the form information and put it in variables.
- Stick the form information into a contact form template (which'll we will create in a second)
- Create an email message using that contact template, and send the message.
- Redirect to our contact page (not ideal, we'll go into why below.)
- Otherwise, just create the template with a blank form.
Create a template form for your email
Before we can test our logic, we need to create an email template. Our email template is going to be simple, just showing the sections that our user filled out. Create a new file in your templates directory (touch contact_template.txt) and fill it in with the info below:
contact_template.txt
Contact Name:
{{ contact_name }}

Email:
{{ contact_email }}

Content:
{{ form_content|safe|striptags }}
Improve the form (optional)
In the screenshot of the form above, we can see that the labels of the form aren't very "pretty" — for example, just saying "Contact name" which is very impersonal.
Django creates these names automatically from your field names, but we can set our own pretty label names in the form definition in forms.py. Update your code to the below:
forms.py
class ContactForm(forms.Form):
    contact_name = forms.CharField(required=True)
    contact_email = forms.EmailField(required=True)
    content = forms.CharField(
        required=True,
        widget=forms.Textarea
    )

    # the new bit we're adding
    def __init__(self, *args, **kwargs):
        super(ContactForm, self).__init__(*args, **kwargs)
        self.fields['contact_name'].label = "Your name:"
        self.fields['contact_email'].label = "Your email:"
        self.fields['content'].label =
            "What do you want to say?"
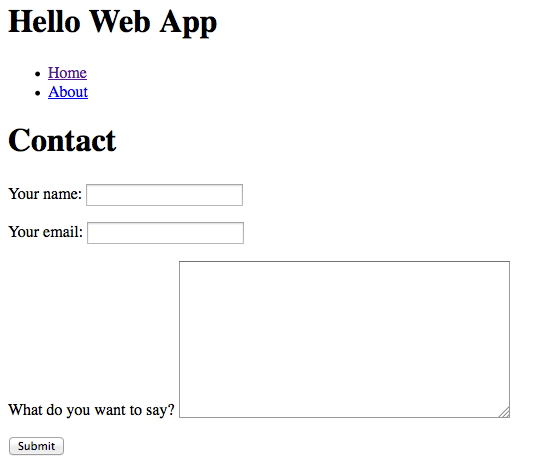
We've added the bit the starts with __init__, which might look a bit confusing. If you ignore the first two lines, the rest are pretty easy to read — we're just grabbing the relevant fields in our form, and updating the label. You can see more information about updating form fields and attributes here in this excellent post.
Once we've reloaded our form, we can see the new labels:
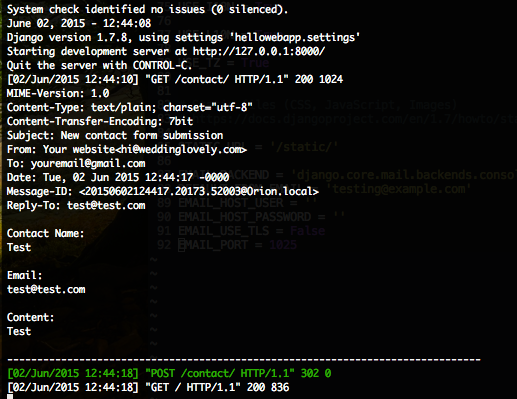
Once we stick in some test information and submit the form, we can see the "email" in our console:
Set up our live email server (optional)
The local email server will output "emails" to your local server, so you can confirm everything is working locally — but when your web app is live, you obviously want those emails to actually land in your email inbox, rather than the server output.
You can do this by setting up something like Sendgrid or Mandrill — freemium email servers where you should just need to sign up for an account, and set the details of your account in your settings.py.
Sendgrid has a great short walkthrough here. If you're at the point in Hello Web App where we've set up a production settings file, you can stick the email server stuff in there, and keep your local/test emails (using the Django console) in your normal settings.py file. This way you can "send emails" as you're developing your app, but you don't have to worry about going over the daily email limit that these email delivery products have in their freemium accounts.
Things that could be improved
I mentioned above that we're, upon successful form submission, redirecting to our app homepage. That would be really confusing to the user, because there is no success message. We have two options here:
- We could set up a separate template that just says "Success!" that we redirect to after successful submission. The easiest, but adding these kind of templates tends to clutter up your templates directory.
- Better, we could utilize the Django messages framework. In your base template file, you can add a "messages" block, and then when you redirect to a page, you could pass along a message (an alert, an error, a warning, an info message, etc.) that'll pop into the top of any page. It's what I use for my production web apps, and I'll probably write a longer article about how to integrate messages soon. In the meanwhile, check out the Django documentation on the messages framework here.
Your contact form is complete!
You now have a working contact form that allows visitors to your web app to email you messages, and hopefully you learned some new skills about creating forms in Django and working with email.
If you haven't taken a look at my book, Hello Web App, teaching beginner web app development using Django yet, I highly encourage you to: https://hellowebbooks.com/learn-django/
Thanks everyone, and happy to answer any questions in the comments!